20 How to Measure for Kitchen Ideas That Designers Keep Coming Back To
- Measure Twice, Order Once
- Start With the Full Room Perimeter
- Account for Out-of-Square Walls
- Measure Ceiling Height in Several Spots
- Note Window and Door Placement Precisely
- Map Out Existing Plumbing and Electrical
- Measure Appliance Footprints Before Shopping
- Leave Proper Clearance Around the Range
- Get the Work Triangle Distances Right
- Double-Check Cabinet Depth Against Wall Space
- Measure for Island or Peninsula Walkways
- Account for Cabinet Door and Drawer Swing
- Measure Countertop Overhangs Carefully
- Note Backsplash Height and Outlet Placement
- Confirm Sink and Faucet Placement Together
- Measure for Pantry and Storage Zones
- Check Lighting Fixture Placement and Height
- Measure Flooring Transitions Between Rooms
- Verify Window Treatment Measurements Separately
- Recheck Everything Before Final Installation
20 How to Measure for Kitchen Ideas That Designers Keep Coming Back To
Measuring for a kitchen sounds simple until you’re standing there with a tape measure wondering if you should account for the baseboard or not. I’ve watched plenty of renovations stall out because someone eyeballed a number instead of double-checking it. Designers have their own tricks for getting this right the first time, and honestly, once you know them, you’ll never measure a kitchen the same way again.
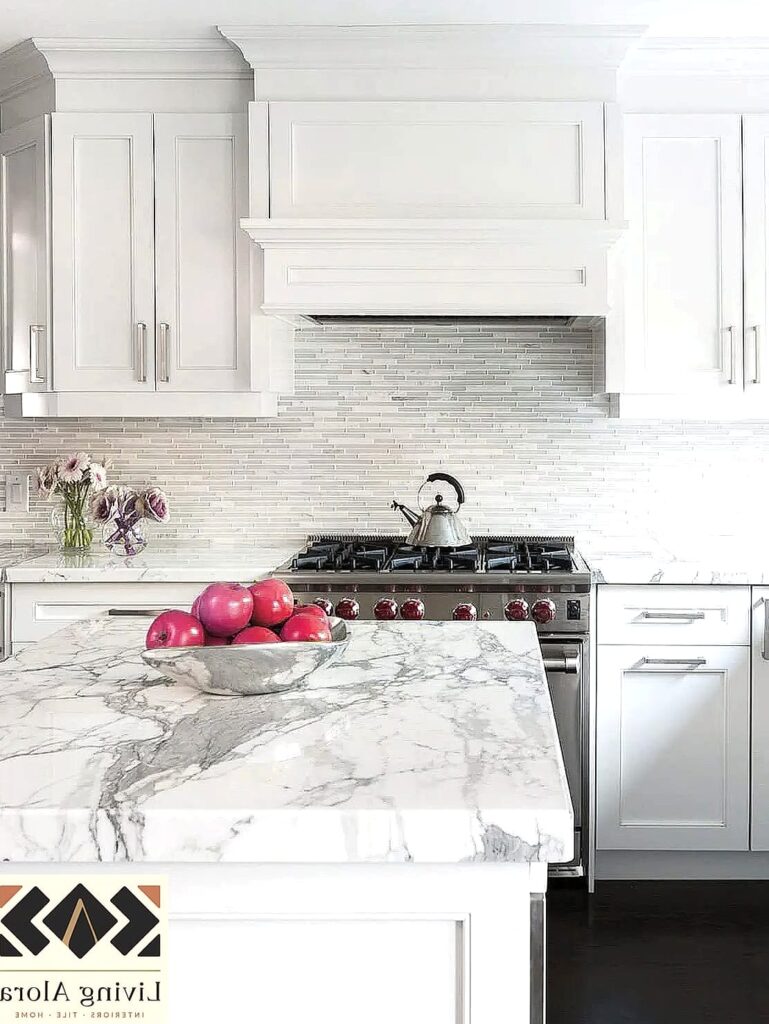
Measure Twice, Order Once

This isn’t just an old carpenter’s saying, it’s basically kitchen renovation law. Cabinets, countertops, and appliances are expensive enough that a half-inch error can throw off an entire layout.
Designers keep a running list and remeasure everything right before placing final orders, not just at the start of a project. Walls settle, floors aren’t always level, and initial estimates can shift once demo happens.
Grab a steel tape measure instead of a cloth one for accuracy. Write every measurement down immediately rather than trusting your memory for even five minutes.
Start With the Full Room Perimeter

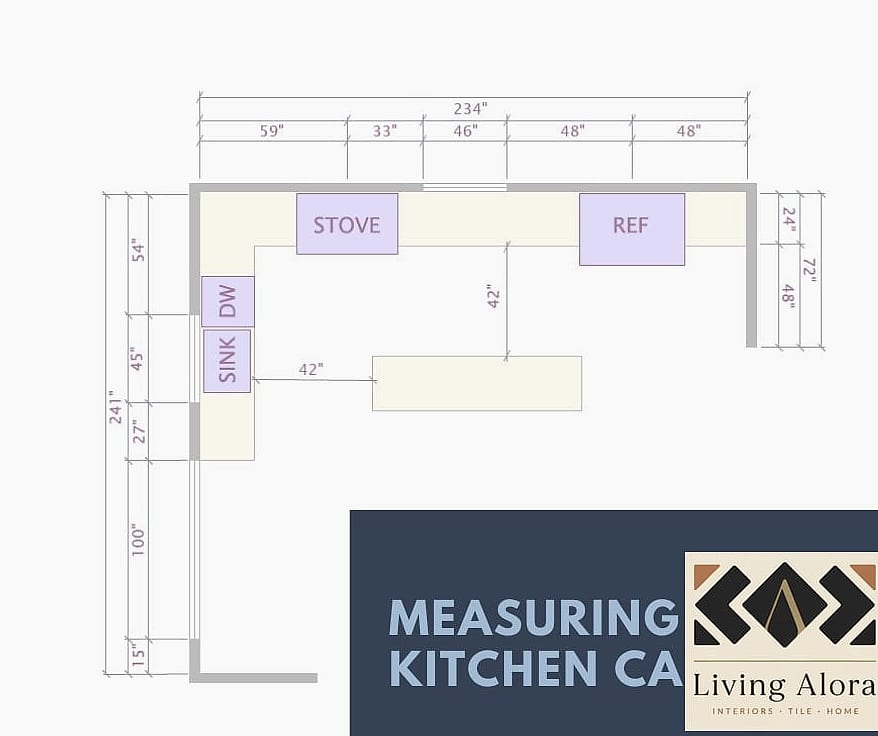
Before you get into cabinet widths or appliance gaps, measure the entire room from corner to corner. This gives you the big picture number you’ll reference constantly throughout planning.
Walk the perimeter with your tape measure and note every wall length, including small jogs or alcoves. Kitchens rarely have perfectly square corners, so don’t assume symmetry.
This total measurement helps you figure out how much cabinetry, flooring, and backsplash material you’ll actually need. It also reveals whether your dream layout will physically fit before you fall in love with a design that doesn’t.
Account for Out-of-Square Walls
Older homes especially tend to have walls that aren’t perfectly straight, and this trips up a lot of first-time measurers. A wall might read 120 inches at the bottom and 121 at the top.
Designers measure at multiple heights, typically floor level, counter height, and near the ceiling, then use the smallest number for cabinet ordering. It’s better to have a tiny gap than cabinets that don’t fit at all.
If you’re working with a contractor, mention any noticeable bowing or unevenness upfront. This changes how filler pieces and scribe strips get planned into the layout.
Measure Ceiling Height in Several Spots
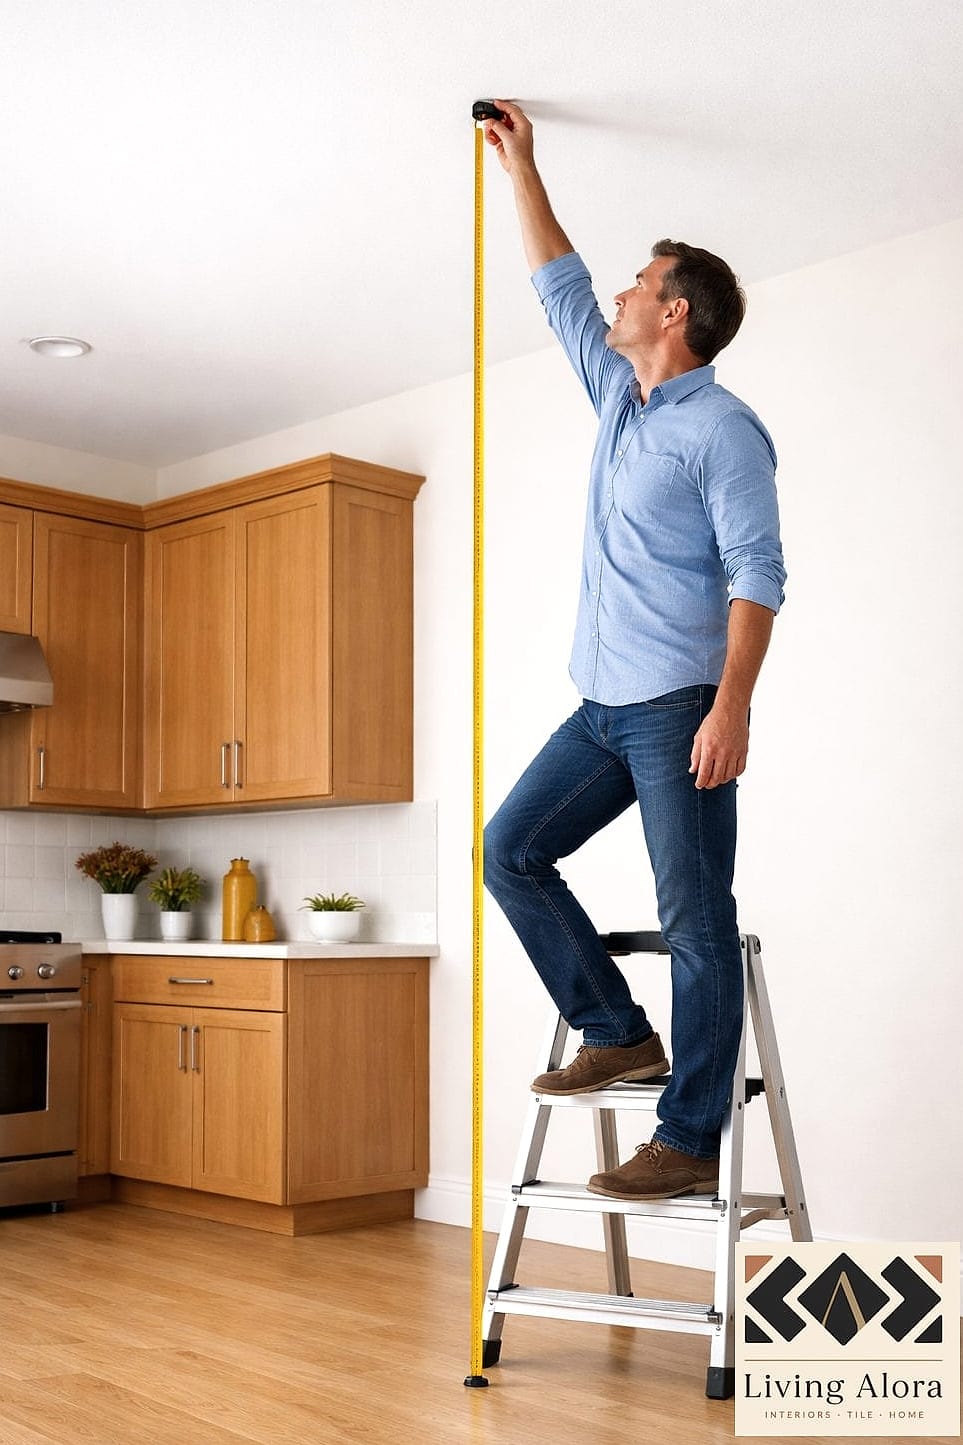
Ceiling height affects everything from upper cabinet placement to whether you can add crown molding or a decorative range hood. Most people measure once near the entrance and call it done.
Instead, check the height in at least three different spots across the room. Older homes can have ceilings that dip or rise slightly, which matters more than you’d think for upper cabinets.
This measurement also determines whether standard-height cabinets will leave an awkward gap near the ceiling, or whether you’ll want to go with taller upper cabinets to fill the space cleanly.
Note Window and Door Placement Precisely
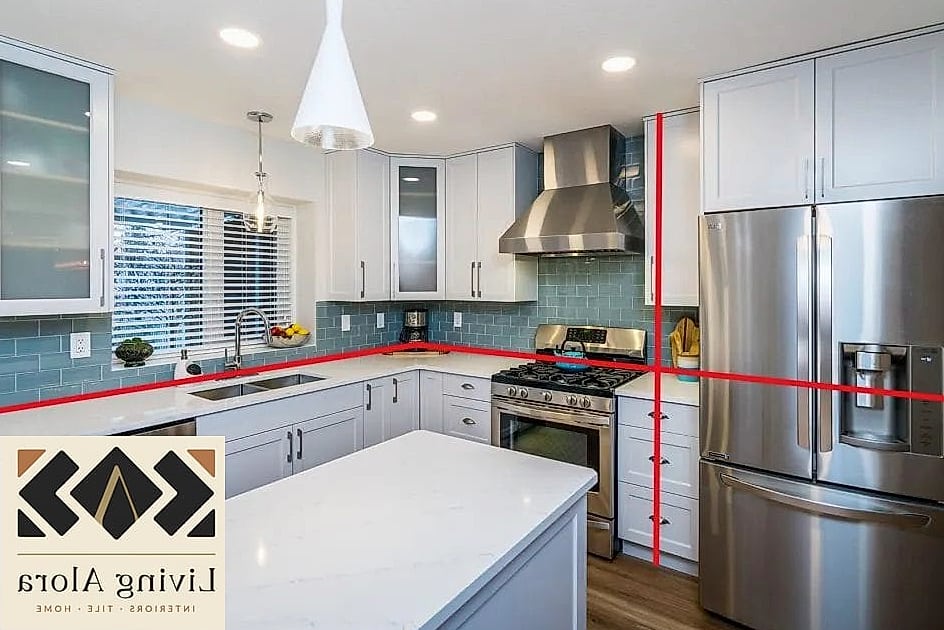
Windows and doors are fixed points that everything else in your layout has to work around. Measure from the corner of the room to the edge of each window and door frame, not just the opening itself.
Include the trim width in your measurements, since cabinets and counters need to clear it. This is a detail that gets missed constantly and causes headaches during installation.
Also record the height from the floor to the bottom of any window, especially if it sits above where a sink or counter will go. This number determines whether standard-depth counters will clear the sill.
Map Out Existing Plumbing and Electrical

Even if you’re changing the layout, knowing where current plumbing and electrical lines run saves money and prevents surprises during demo. Moving a sink line is doable, but it adds cost you’ll want to plan for.
Designers sketch a rough floor plan and mark every outlet, switch, gas line, and water shutoff before finalizing a new layout. This becomes your reference point for where new appliances and fixtures can realistically go.
If you’re keeping the sink or range in its current spot, this step is even more important since it locks in a starting point for the rest of your measurements.
Measure Appliance Footprints Before Shopping
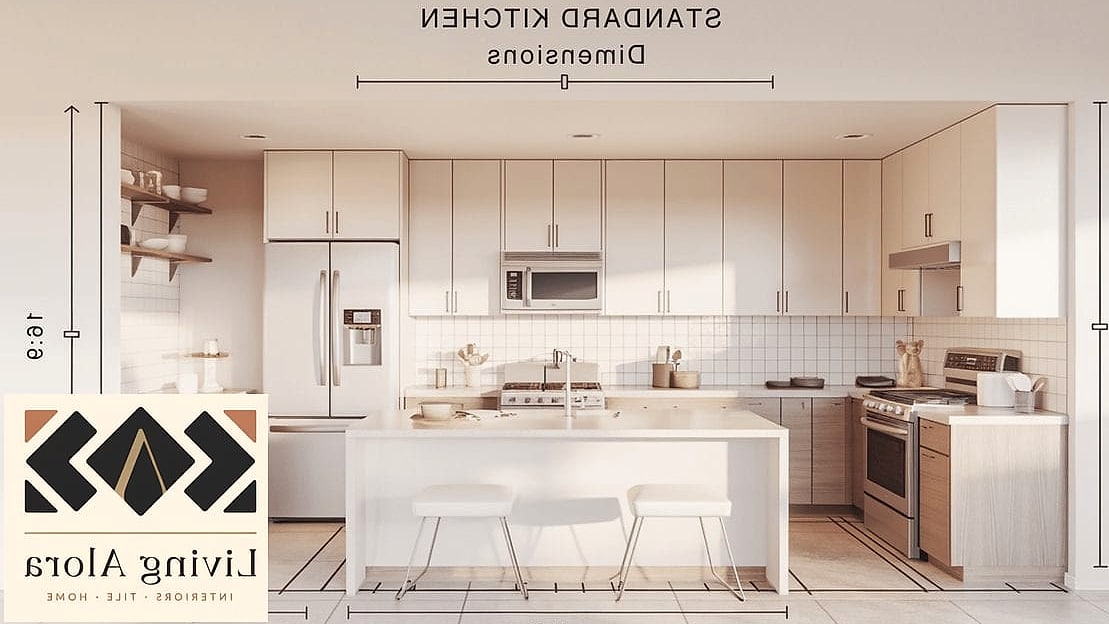
It’s tempting to fall in love with a range or refrigerator online and figure out the space later. Do it the other way around instead.
Measure the exact width, depth, and height available for each appliance, then add a couple inches of clearance where manufacturers recommend it. Refrigerators especially need extra room for door swing and ventilation.
Bring these measurements with you when shopping, whether in person or online. It keeps you from getting talked into a fridge that’s technically too wide for the slot you have.
Leave Proper Clearance Around the Range

Building codes and safety guidelines call for specific clearances around cooking surfaces, but designers also think about comfort here, not just compliance. You want room to open the oven door without bumping into an island.
A general guideline is at least 30 inches of clear floor space in front of the range, though more is better if your kitchen allows it. Measure this before finalizing island or peninsula placement.
Don’t forget vertical clearance too, especially if you’re adding a range hood or microwave above the cooktop. There are minimum height requirements for safety that vary by appliance type.
Get the Work Triangle Distances Right
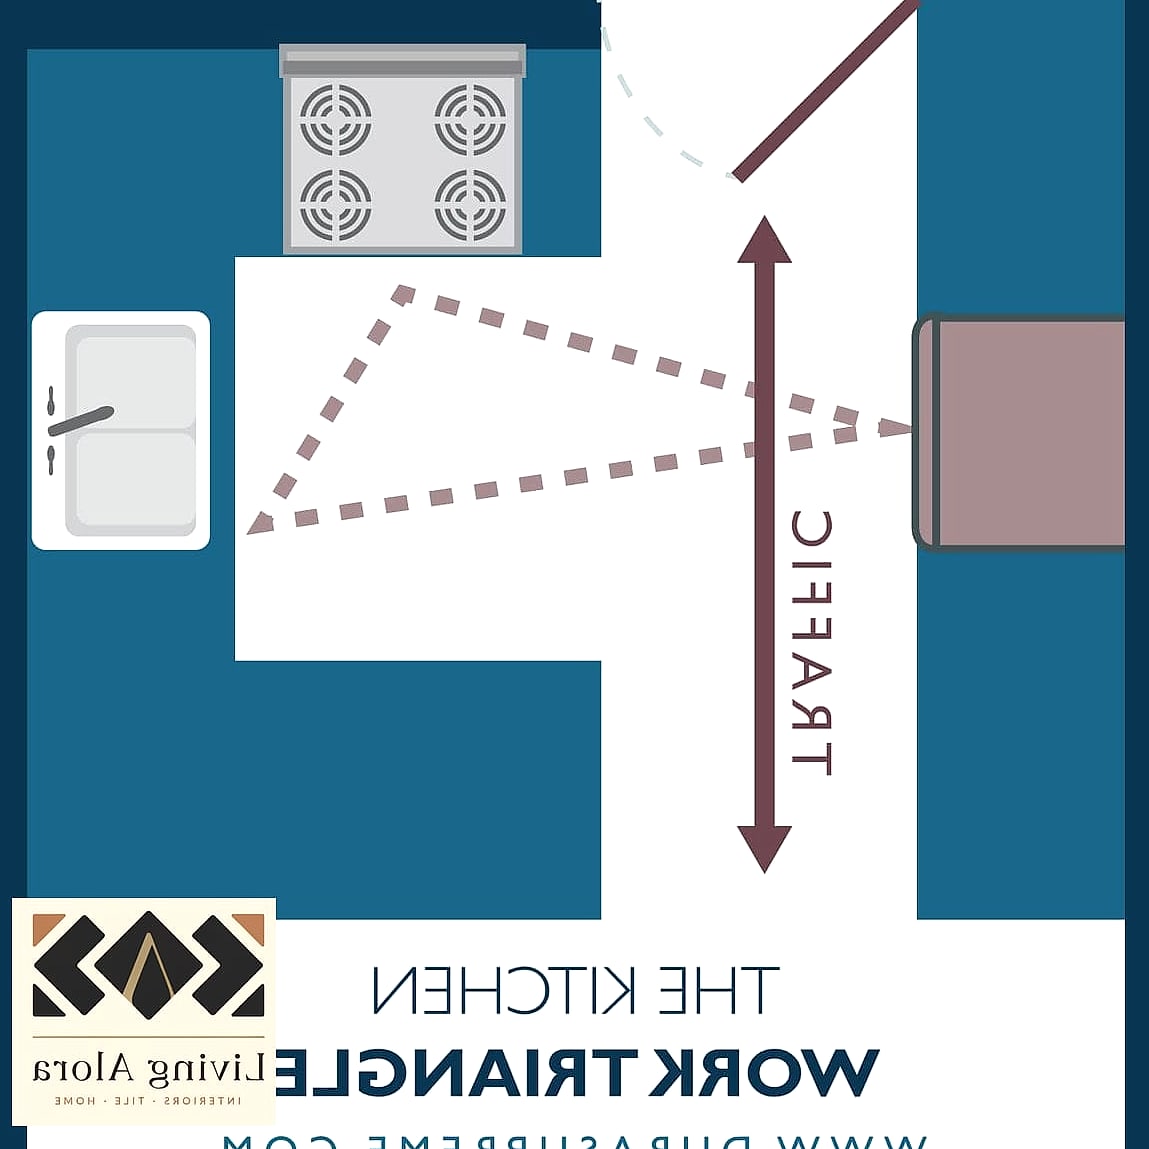
The classic kitchen work triangle connects the sink, stove, and refrigerator, and while modern layouts have evolved past a strict triangle, the spacing principle still matters. You want these three points close enough to be efficient without feeling cramped.
Designers generally aim for each leg of the triangle to fall somewhere between four and nine feet. Measure the distances between your planned appliance locations to check you’re in a reasonable range.
Larger kitchens sometimes use work zones instead of a strict triangle, but the underlying idea is the same: measure to avoid unnecessary walking between your most-used spots.
Double-Check Cabinet Depth Against Wall Space

Standard base cabinets run about 24 inches deep, but that number can shift depending on the cabinet line and whether you’re adding a countertop overhang. Measure your available wall depth before assuming standard sizing will work.
This matters most in narrow kitchens or galley layouts where every inch counts. A slightly deeper cabinet run can eat into walkway space faster than you’d expect.
If you’re working with an existing footprint, measure from the wall to where you want the cabinet face to land, then work backward to confirm the depth fits comfortably.
Measure for Island or Peninsula Walkways

An island can completely transform a kitchen, but only if there’s enough room to walk around it comfortably. Designers measure walkway clearance on all sides before finalizing island dimensions.
A good rule of thumb is at least 36 inches of clearance for walkways, and closer to 42 inches if multiple people will be cooking at once. Measure this from the island edge to the nearest cabinet or counter.
If your kitchen is on the smaller side, a narrower rolling cart or a peninsula instead of a full island might make more sense once you see the actual numbers.
Account for Cabinet Door and Drawer Swing
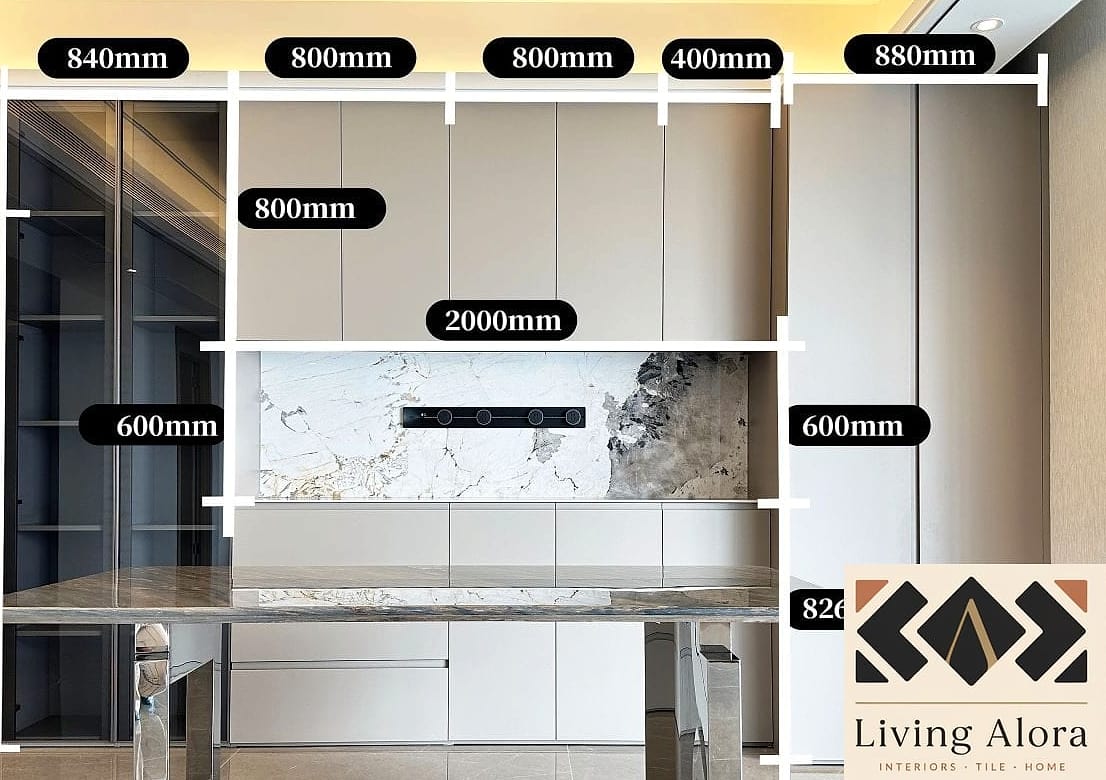
It’s easy to measure the footprint of a cabinet and forget that doors and drawers need room to open fully. This becomes a real problem when cabinets face each other across a narrow walkway.
Measure the swing radius of cabinet doors, especially corner cabinets, and check that drawers can extend fully without hitting an island or opposite counter. Some kitchens end up with soft-close hinges specifically to manage tight clearances.
This is also where drawer organizers and pull-out shelving come in handy, since they can reduce how far a door needs to swing open in cramped layouts.
Measure Countertop Overhangs Carefully

If you’re planning a breakfast bar or seating area at the counter, overhang measurements matter more than people realize. Too little overhang means no knee room, too much can create a structural issue without proper support.
Designers typically recommend at least 12 inches of overhang for comfortable seating, with support brackets required beyond about 10 to 12 inches depending on the countertop material. Quartz and granite have different support needs than butcher block.
Measure the planned seating height too, whether it’s standard counter height or a raised bar height, since stool sizing depends entirely on this number.
Note Backsplash Height and Outlet Placement

Backsplash measurements go beyond just wall length. You need to know the exact height from countertop to the bottom of your upper cabinets, since that’s typically where backsplash tile ends.
Outlet placement matters here too, since electrical code requires outlets at specific intervals along counter space. Measure where these fall so your tile layout, whether it’s classic subway tile or a herringbone pattern, can be planned around them instead of cut awkwardly.
If you’re doing a full-height backsplash behind the range, measure that separately since it often extends higher than the rest of the counter run.
Confirm Sink and Faucet Placement Together
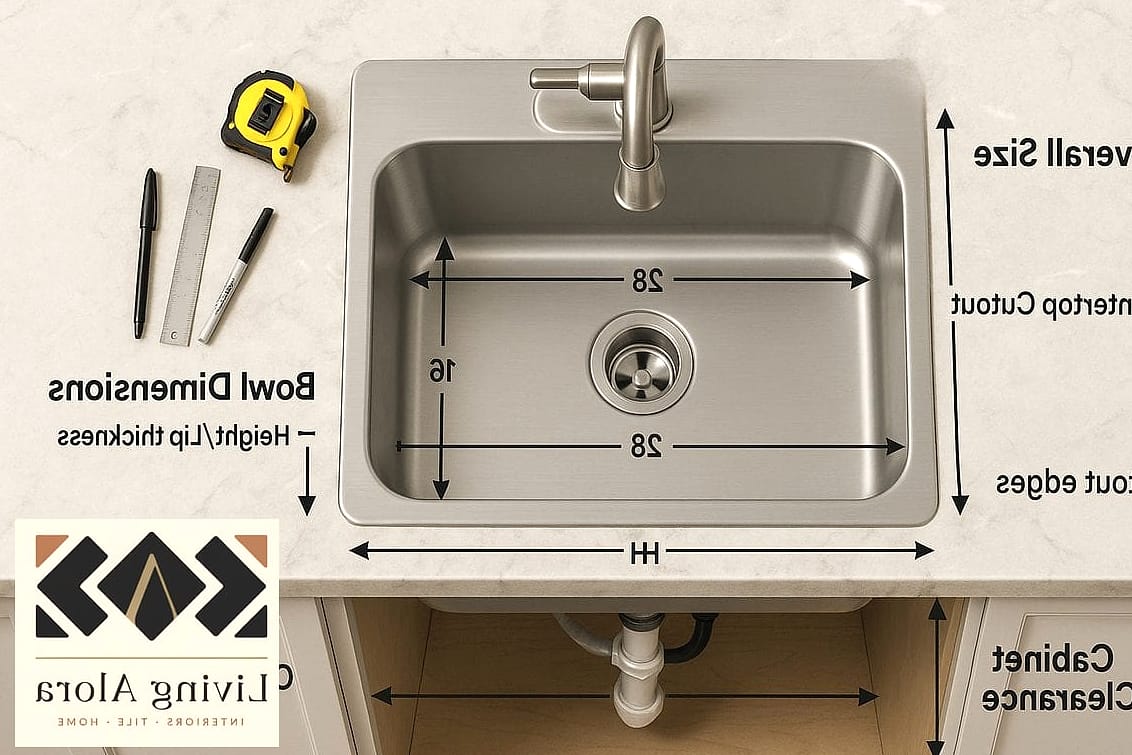
Sink and faucet measurements go hand in hand, but people often measure one without the other. Start with the sink cabinet width, then measure where the faucet holes need to align based on the sink you’ve chosen.
Farmhouse sinks in particular require different cabinet modifications than standard drop-in sinks, so measure early if you’re set on that apron-front look. Retrofitting later gets expensive.
Also check the depth of your sink base cabinet against the sink’s actual dimensions, since some deep basin sinks need more clearance than standard cabinets provide.
Measure for Pantry and Storage Zones
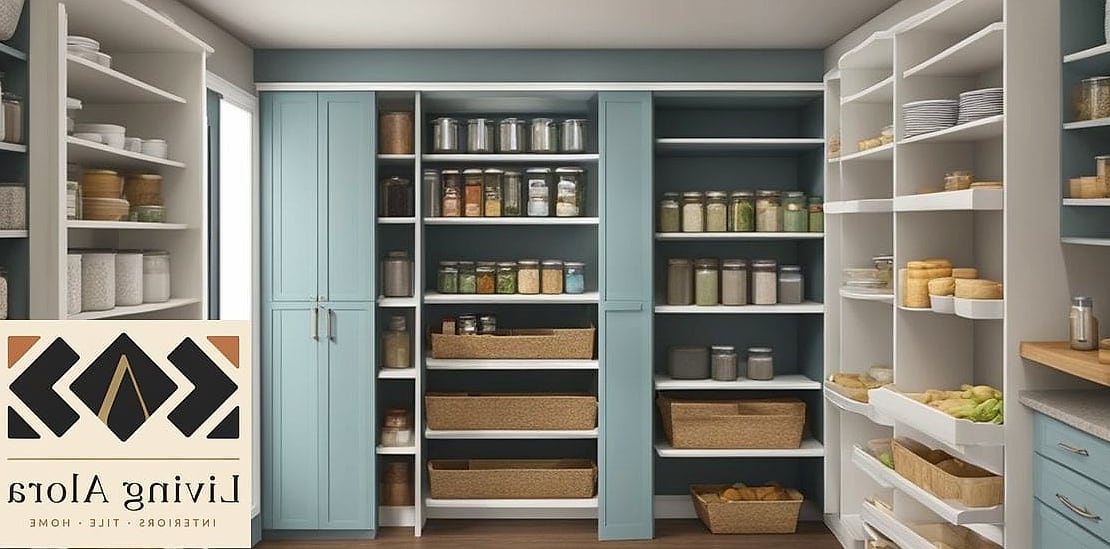
Storage often gets planned last, which is backwards from how designers actually approach it. Measure available space for a pantry, whether it’s a walk-in, a reach-in cabinet, or a pantry cabinet with pull-out shelving, early in the process.
Consider the depth needed for baskets, bins, and stackable containers you plan to use for organization. Shallow pantries work better with narrow bins, while deeper ones can accommodate rolling shelves or lazy susans.
If floor space is tight, measure vertical wall space too. Floating shelves or a tall, narrow pantry cabinet can add real storage without expanding the footprint.
Check Lighting Fixture Placement and Height

Lighting measurements are easy to skip until you’re staring up at a pendant light hanging too low over your head. Measure from the ceiling to your intended fixture height, accounting for counter or island height below it.
For pendant lighting over an island, a general guideline is 30 to 36 inches above the counter surface, though this shifts depending on ceiling height and fixture size. Measure your specific ceiling before ordering fixtures.
Layered lighting, meaning task, ambient, and accent lighting together, requires mapping out multiple fixture locations rather than relying on one central overhead light.
Measure Flooring Transitions Between Rooms
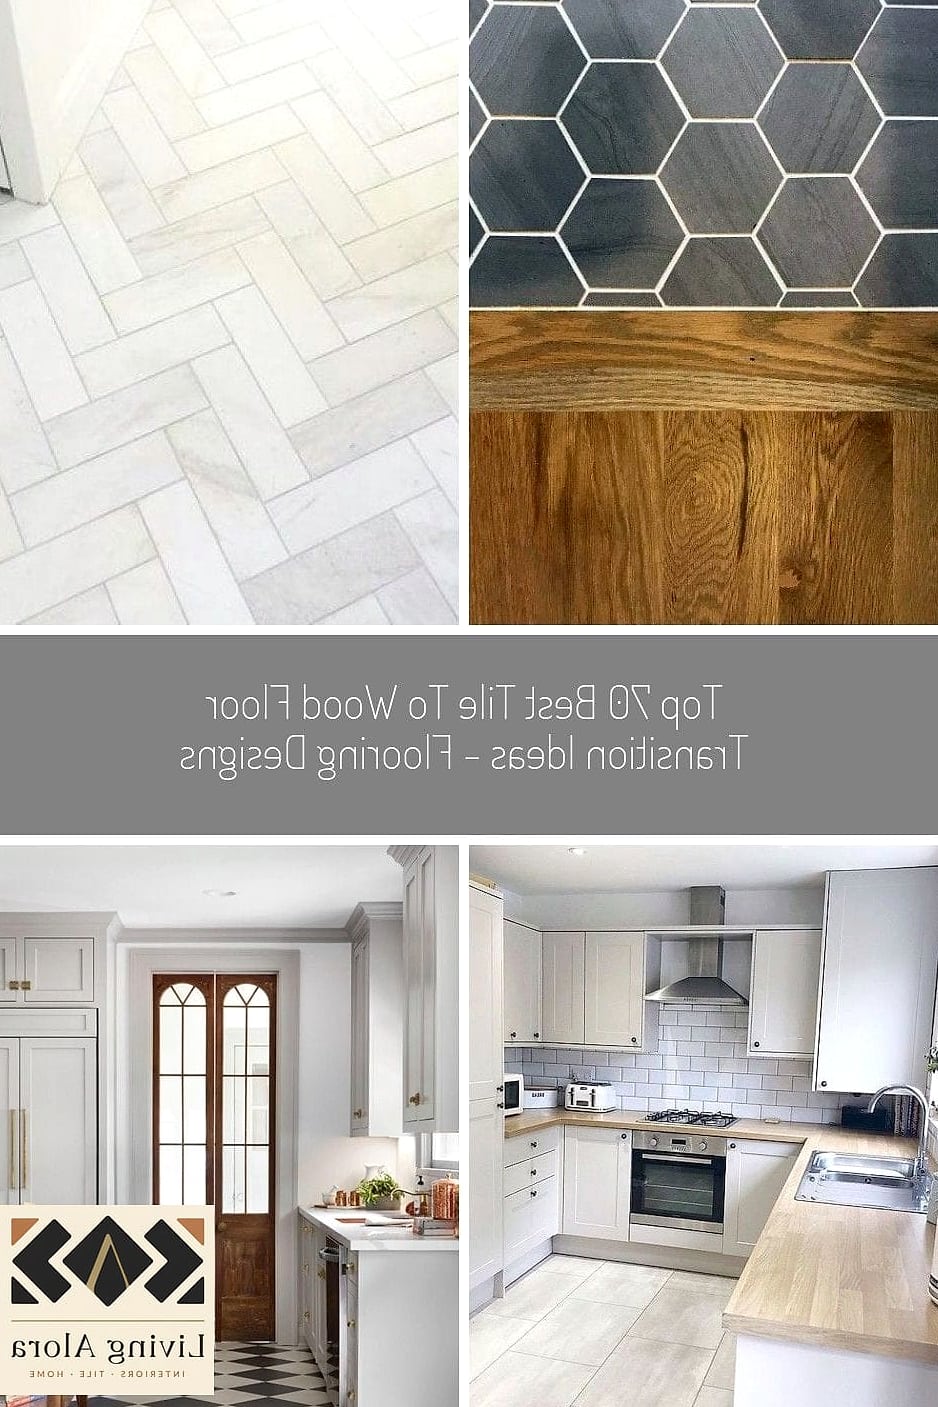
If your kitchen flooring meets a different material in an adjoining room, measure that transition point carefully. Height differences between flooring types can create trip hazards or awkward gaps if not planned for.
Designers measure the thickness of both flooring materials before installation to determine whether a transition strip is needed. This is especially common when kitchen tile meets hardwood or carpet in a connected living space.
Don’t forget to measure under appliances too, since flooring installed after appliances are set can create uneven surfaces that are hard to fix later.
Verify Window Treatment Measurements Separately
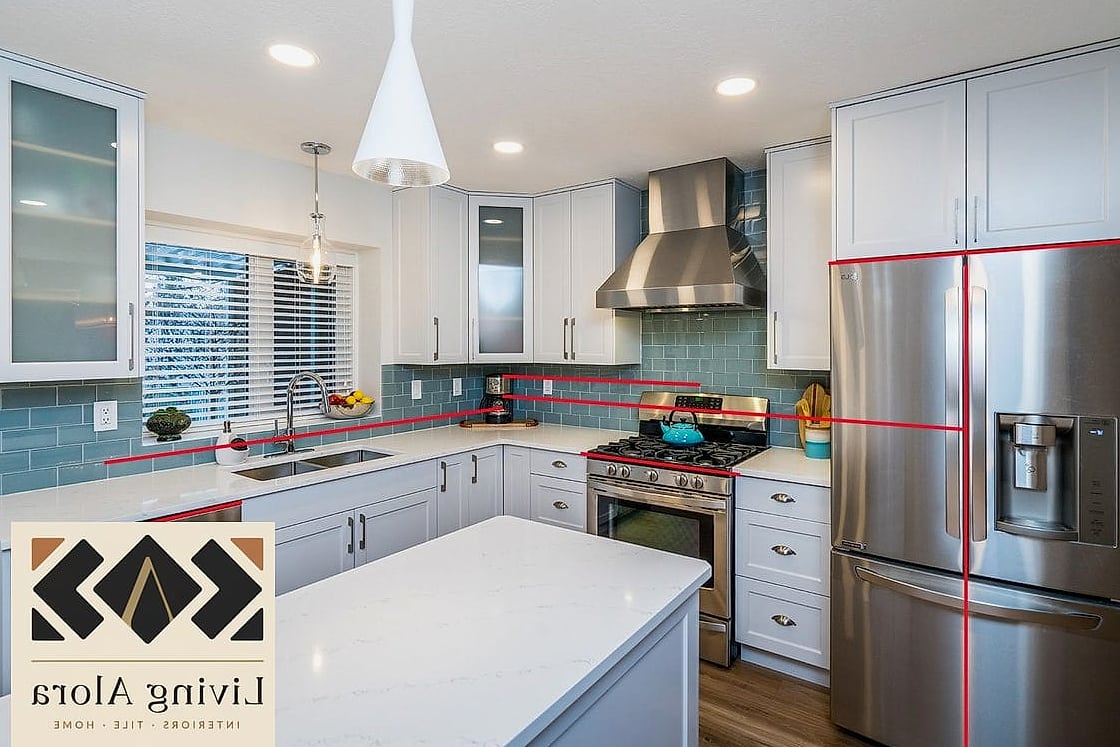
Kitchen window treatments have their own measuring rules, separate from the window opening itself. Measure both inside the frame and the outer trim, depending on whether you want an inside-mount or outside-mount treatment.
For kitchens near a sink or range, consider measuring for shorter cafe curtains or blinds that sit above the counter line, keeping fabric away from water and heat sources.
If you’re adding treatments to a window above the sink specifically, double check the depth of your counter and faucet reach so treatments don’t interfere with daily use.
Recheck Everything Before Final Installation

The last measuring step designers swear by is the final walkthrough measurement, done right before cabinets, counters, or flooring get installed. Things can shift during demo, and a fresh check catches problems before they become permanent.
This is your last chance to confirm appliance clearances, outlet placement, and cabinet fit against the actual finished walls rather than the estimated ones from weeks earlier.
It might feel redundant after measuring so many times already, but this final pass is often what separates a smooth installation from a stressful one.